
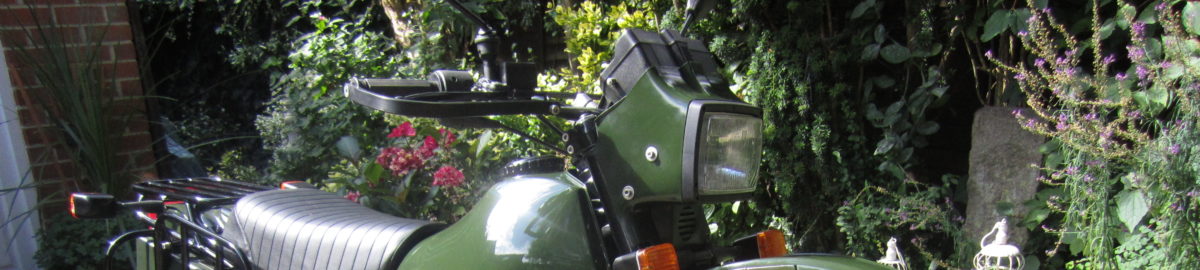
The Honda XR250R is an off-road motorcycle built between 1979 and 2004. In the late 1990’s, the XR250R was used by the British Army in small numbers at a time when it was still using the Harley Davison MT350 for more general use. The advantage of the XR250 was that it was a much lighter motorcycle (104 kg versus 162 kg) and had much better off-road performance.
The XR250 uses a 250 cc single cylinder, SOHC, 4-valve engine incorporating what Honda call the Radial Four Valve Combustion (RFVC) engine. In this design, separate rockers and camshaft lobes are used for each valve but the valves are actually opened via sub-rockers.
One of the interesting aspects of the later XR250R engines like my 1997 version, and one that can take some getting used to, is the auto-decompressor fitted to the right-hand end of the camshaft. With any kickstart single cylinder engine with large enough capacity or compression, there are two separate problems usually faced in trying to start the engine. The first is to be able to rotate the engine just past TDC on the compression stroke to give it the greatest chance of starting when the kickstart is used in anger. The second is the possibility of the engine kicking back. The latter is caused when the engine fires before TDC on the compression stroke but has insufficient momentum to carry it past TDC causing it to fire backwards together with the kickstart lever with usually painful consequences for the riders right leg!
The auto-decompressor on the XR250R overcomes both of these problems in a somewhat ingenious way. It comprises a 1-way clutch fitted with two separate cams: a decompression cam and a reverse compression cam. With the engine rotated slowly forwards, the auto-decompressor rotates the decompression cam against the right-hand exhaust rocker slightly opening the valve when it is near TDC on the compression stroke. This allows the engine to be easily rotated through TDC on the compression stroke via the kickstarter. As soon as the engine starts, the auto-decompressor disengages the decompression cam allowing the right-hand exhaust valve to then operate normally.
However, if the engine tries to kick back, the one way clutch operates and rotates the larger reverse cam to engage and open the right-hand exhaust valve fully. This effectively, stops the kick back and protects the rider’s leg. The one slight disadvantage of the auto-decompressor is that it makes doing a compression test difficult because it will slightly open the right-hand exhaust valve near TDC on the compression stroke. To overcome this problem, it is necessary to set the tappet clearance on this valve to be large enough so that it does not open via the auto-decompressor.
In addition to the auto-decompressor, my 1997 XR250R is also fitted with a manual decompressor via a handlebar lever. This is needed primarily to clear the fuel from the cylinder if the engine has not started after a number of tries. To do this, the decompressor lever is pulled and then the engine kicked over half a dozen times. The manual decompressor is also useful in other ways, such as during bump starting of the bike.
The clutch is situated on the right-hand side of the engine as is the kick-starter. The oil pump is on the front right of the engine and the engine incorporates a paper oil filter with an access cover on the right-hand side. The generator housing is on the left-hand side of the engine as is the gearbox drive sprocket which can be easily changed.
The XR250R does not use a battery as part of its electrical system with everything powered by the generator. This has 3 separate coil systems. One of these sets of coils powers the light and horn via an AC regulator. Another set powers the turn indicators, the stop light and the ignition control module (CDI system) via a separate DC rectifier/regulator. A third set of coils then provides the electrical power (magneto) that produces the HT voltage to the spark plug via the Ignition Control Module (ICM). The timing of the spark is controlled by a magnetic pickup within the generator which is also connected to the ICM. Since the XR250R was intended mainly for off-road use, a horn and indicators was not provided for the bikes sold in most countries. One of the exceptions was the Australian version which my restored XR250R is based on.
The XR250R uses an oil-in-the-frame, semi-double cradle steel using both round and rectangular section tubing. On the later XR250R, the top mount for the mono-shock rear damper is mounted on the main frame. A steel sub-frame is bolted to the back of the frame to provide support for the seat and rear mudguard. Braking is via disks on both wheels.
The XR250 uses taper roller bearings for the steering head. On later models, 41 mm cartridge front forks are used. The rear suspension uses a single damper with concentric spring with Honda’s Pro-Link suspension link attached to the swinging arm. This provides a progressive rate effect for the rear suspension.
My XR250R Restoration
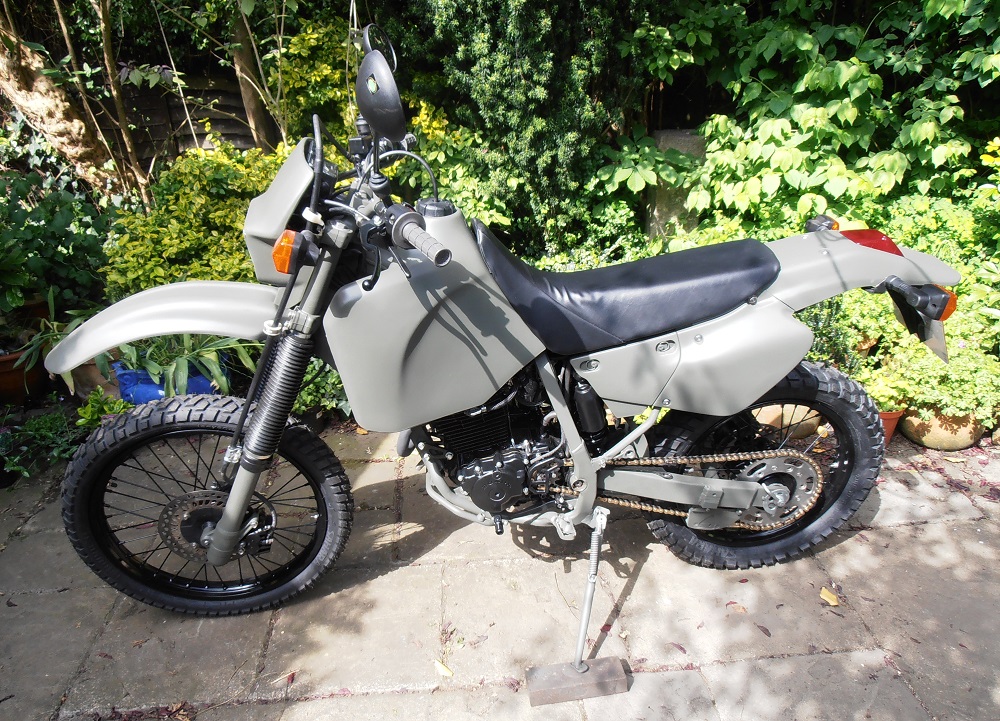
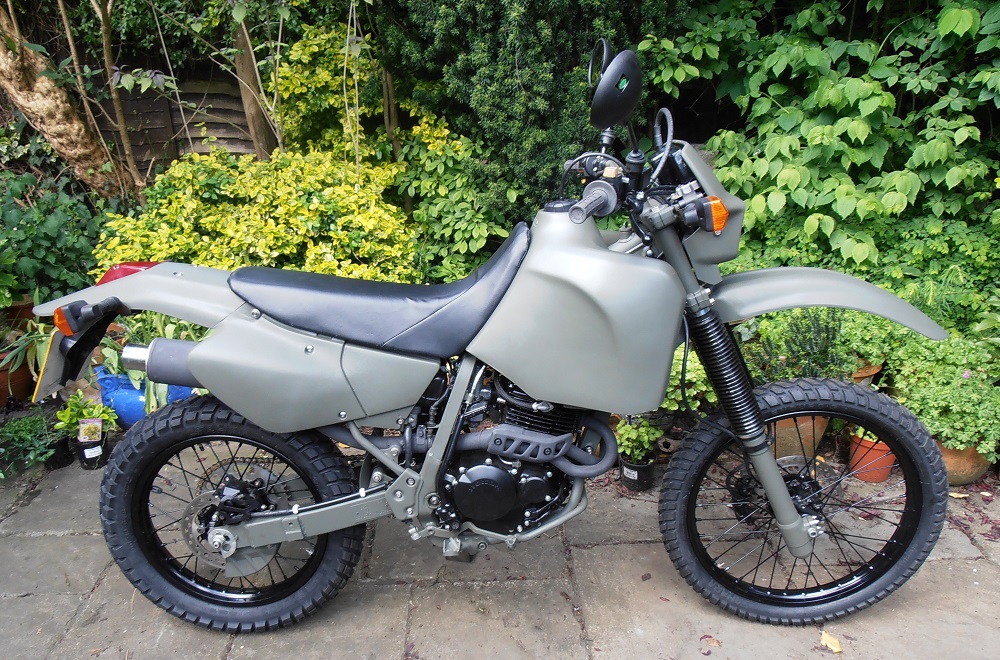
My XR250R was in reasonable condition when I bought but I gave it a full nuts & bolts restoration. Since it was ex-army, I decided to paint the XR250R in the NATO Green colour used at this time. When restoring motorcycles, I normally get as much of the frame and fittings powder coated as possible, as spray painting them is much more difficult and time consuming. However, in the case of the XR250R, I was not sure that I could match the matt NATO Green colour achieved via powder coating with the paint available for spray coating. I therefore decided to spray paint the whole bike. The only exception was the wheels which were powder coated in satin black.
The main problem in stripping the bike down to its nuts & bolts is a common one with this bike; namely that the swinging arm spindle corrodes and seizes on the bearing journals. The reason for this is that the spindle is provided with dust shields rather than proper seals and this allows moisture to get in corroding the spindle and journals together. No matter how much force was applied to the end of the spindle, it would not budge. In this situation, the only way to extract the spindle is to cut through it either side of each journal which is not easy because the journals are hardened steel and they are not easy to get at. In the end, I had to use a small cuttings disk which eventually did the job. To prevent this problem, many owners take the trouble of removing the spindle each year to re-grease it.
Although the main part of the XR250R frame was in reasonable condition, the rear sub-frame was very rusty where mud and grime had collected underneath. There was nothing I could do to restore the sub-frame and therefore I had to get a replacement which I bought on eBay at a reasonable price.
Spray painting the metal parts in matt NATO Green was straightforward but painting the plastic parts was more of a challenge. A plastic primer needs to be used as the first layer on plastic to ensure proper adhesion of the subsequent paint layers. My ex-army XR250R was fitted with a plastic long range petrol tank rather than the standard metal one. The problem with painting the outside of a plastic petrol tank is that petrol component can diffuse through the plastic and cause the paint to bubble or flake off on the outside. To prevent this I therefore used suitable petrol resistant sealant on the inside of the tank to prevent the leaching. So far there has been no problems with the tank.
The engine was in reasonable condition when I bought it but I carried out a top end overhaul to check the condition of the piston, rings and valves. The valve seats were re-ground and the valve stem oil seals replaced. Other than that, the engine was relatively low mileage and required little doing to it internally. Externally, the engine did not looks great and was repainted in suitable high temperature paint and all the flanged bolts holding the engines covers on were replaced with new items.
The wiring harness on my XR250R was in reasonable condition although some of the connectors needed to be replaced. For army use, the XR250R was not fitted with indicators nor did the wiring harness show them. I decided to retro fit them but the small metal brackets and the indicators themselves were not available in Europe at the time and, in the end, I had to buy them from further afield. To modify the wiring diagram to accommodate the indicators, I ended up using the diagram for an Australian version of the bike which had them fitted from new.
The braking system was in reasonable condition but the callipers were overhauled and new seals and pads fitted.
The XR250 did not come with a rear rack as standard but was fitted with a tail bag mounted above the rear light for small items. I preferred the idea of a rack and managed to obtain a good looking one from the USA which bolted on to the rear sub-frame.

XR250R Performance
I did not really acquire the XR25R to ride but simply to add it to my collection of ex-army bikes. On paper the 24.5 Nm of torque is not that impressive for an off-road bike but the XR250R makes up for this with it’s long travel suspension system which can soak up the worst of off-road conditions. I rode the bike on the road but its very soft suspension takes some getting used to.
Honda XR250R Specifications
- Engine: Single cylinder, SOHC, 4-valve, 4-stroke
- Starting: Kickstart only
- Capacity: 249 cc
- Bore/Stroke: 73 x 59.5 mm
- Compression: Ratio 10.2:1
- Max Power: 30 bhp
- Max Torque: 24.5 Nm
- Carburettor: Honda PDG1C
- Cooling: Air cooled
- Lubrication: Dry sump
- Ignition: CDI with magnetic pick-up
- Transmission: 6 speed
- Final Drive: Chain
- Front Suspension: 41 mm cartridge forks with 270 mm travel
- Rear Suspension: Pro-link 270 mm travel
- Front Brake: 240 mm single disk
- Rear Brake: 220 mm single disk
- Rake/Trail: 25 deg and 92 mm
- Wheel Base: 1.4 m
- Seat Height: 915 mm
- Front Tyre: 80/100-21
- Rear Tyre: 100/100-18
- Ground Clearance: 305 mm
- Dry Weight: 104 kg
- Fuel Tank: 22 L
- Oil Tank: 1.7 L
17,413 total views, 10 views today